Facebook Custom Audiences – How to Setup and Avoid Rookie Mistakes
What is a Custom Audience
Custom Audiences allow you to categorize people into various groups. The grouping is determined by your requirements and these can be as simple as visitors to your website or a group segmented by their interests, behaviours, income, gender and age grouping. In fact the segmentation options are nearly endless.
Why use Custom Audiences
Every advertiser worth his or hers salt knows that to create amazing ROI its required that we match our advertising as closely as possible to the target audience. Facebook audiences enable us to build tight focused groups of prospects. Initially the audience may start out very broad such as those interested in Triathlons aged over 40. However after analyzing your initial result we may detect that the segment of our audience that responds are 45 to 55 old men with a high disposable income in professional and engineering roles. Therefore at this point you will need to adapt your advertising strategy.
Re-marketing Audiences
With Custom Audiences on Facebook it is now possible to reach people with whom you have already established a relationship with via Social Media or Website visits.
But there is one thing these categories should have in common, the people in them should have already demonstrated interest in either your products or services. This way you know that the chances of conversion are much higher.
The easiest way of doing this is by either importing a list of people’s emails and telephone numbers or a by using a list of website visitors, after all we are showing you how to start everything from the ground up, you can worry about other categories further down the line.
Let’s start with how you find and set Audiences on Facebook Business Manager.
It’s possible to set your Audiences in two ways, the first is through: Ads Account > Tools > Audiences.
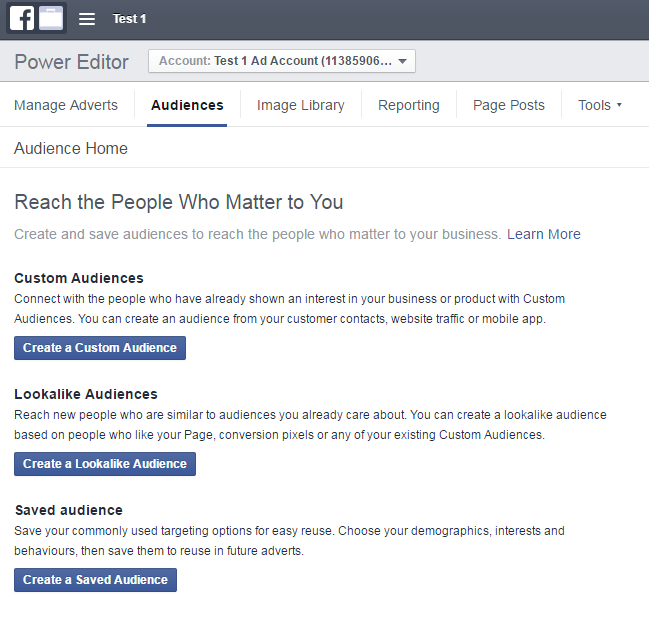
The other way to create Custom Audiences is by going to “Power Editor” then to “Audiences” followed by “Create Custom Audience” (we covered Power Editor on another blog post click here to read more about the Power Editor).
A group of pop-up windows will now be presented and you will have to select a few boxes.
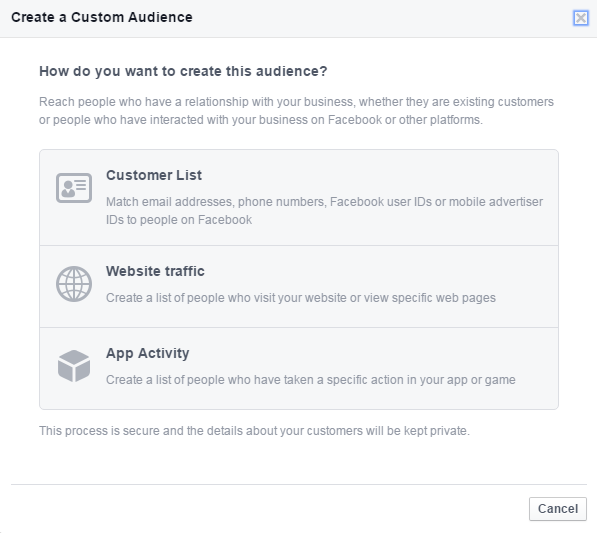
The first pop-up box will be asking you to define how you would like to select your audience, this can be done via a customer list, containing information such as email addresses, phone numbers, user ID’s etc.., website traffic, so the details of people that have been on your website, or via app activity.
In this particular instance we will be uploading a list of emails we already have, therefore we will need to select “Customer list” option.
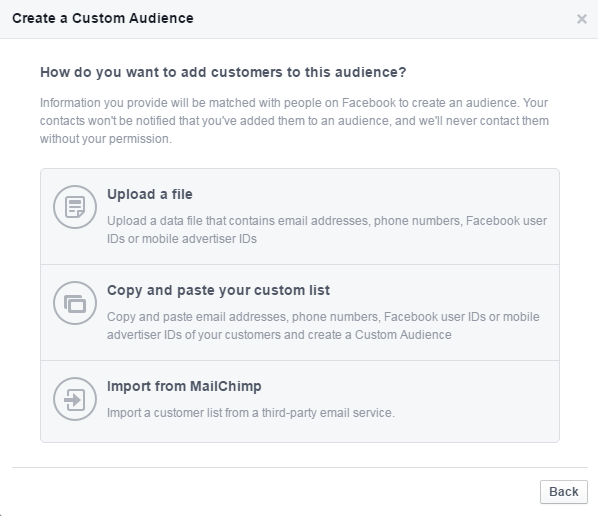
Once you have clicked on “Customer List” a new pop-up window will appear, this time it will ask you to pick the way in which you will add this audience you are creating, we will be selecting “Upload a File”.
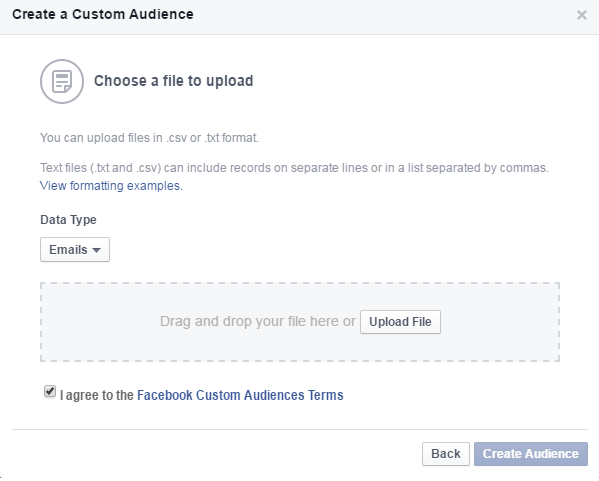
Now that you have selected “Upload a File” a new window will ask you to pick the file you want to upload, please note, this file needs to be in either a .txt or .csv format.
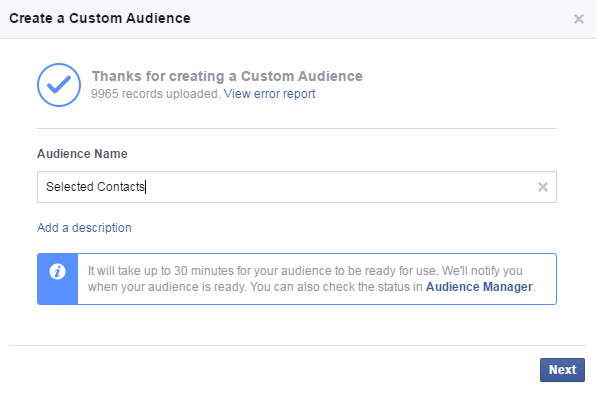
Once you have chosen the file you want to upload, click “Create Audience” which will now be highlighted in blue.


